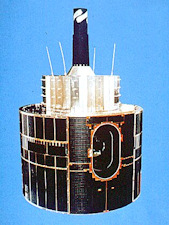
Meteosat
 As the idea of receiving signals from space intruiged me, a receiving station for the Meteosat-7 signals was built.
(Unfortunately, in the meantime Meteosat-7 has been moved to a place above the Indian Ocean, providing data for South Asia and cannot be captured in Belgium anymore.)
The transmissions of the Meteosat geostationnary satellites are used for weather forecast purposes, but also yield a very nice view of the earth from a height of approximately 36.000 km above the equador. Meteosat-7 transmits on two channels at 1691 and 1694.5 Mhz, respectively.
The equipment I used for receiving these signals and converting them to high-resolution pictures can be briefly described as follows:
The first stage was a 4 element Yagi aerial, designed for the frequency range of 1.6 to 1.7 GHz, and mounted in a 80 cm offset parabole (39 dB). The signal was amplified by an LNB (Low Noise Block convertor), directly mounted to the aerial and then converted into an intermediate frequency of 137.5 and 141 MHz, respectively.The corresponding electronic circuits were supplied with a voltage of 5 V via the coaxial cable. Due to this IF (Intermediate Frequency) line attenuation is low and an aerial lead length of up to 25 meters is possible. The parabole was mounted in the tower and fine-tuned in the right direction of Meteosat 7.
The signal was fed into a Grundig MST100 Meteosat Receiver, allowing to switch between the two channels and provided with an automatic fine tuning.
 |
The Grundig MST100 Meteosat-7 receiver |
By modulating on a 2.4 kHz AF carrier, an audio output was obtained, directly accessible on a socket at the receiver. Also present was a direct output to a monitor, for which RGB and CVBS are available at an Euro-AV socket, and a CVBS output. Due to the 2 memories, each with a capacity of 5.2 MBit, it was possible to view the received pictures directly on a monitor. By selecting one of the two output channels, an animated movie of subsequent pictures was displayed and updated as new pictures are received. On the other channel continuous monitoring of the transmitted pictures could be selected. The audio output was connected to a computer via a SDUS high resolution card. The appropriate software immediately displayed the received pictures on the computer monitor and stored them on hard disk in GIF format. The PC configuration used for Meteosat in my shack was quite simple in nowadays terms but enough to get some great high-resolution pictures: Cyrix 486DX-50 - 8 MB EDO RAM - 14" Targa color monitor - video card Trio SVGA 1 MB - hard disk Seagate 430 MB - 3 1/2" diskette station - CD ROM 4 speed.
Images taken by Meteosat-7 are transmitted 24 hours a day, according to a given time schedule. In order to see as much details as possible, the earth is divided into sections, which are scanned in a predefined order. Distinction is made by numbering the individual sections as given in the following figure.
Click on the figure above to see some of the resulting pictures received in my shack.
