ATV (Amateur Television)
 One of the modes that had always drawn my attention and interest was ATV. So one day, I decided to get me some equipment and started some experiments in ATV. In this section much of the how-and-what's I experienced are described. It's quite some reading, but it gives you and idea of what it takes for a ham operator to install a new mode and exploring new horizons.
It all started in my living room where I already had a satellitetuner Strong SRT 331LT with two antenna inputs, (when I bought it I already had the intention to be able to use it one day for ATV reception) since the SRT 331LT was capable of receiving the 23 cm amateur band, including ATV. At first was only used for capturing broadcoast satellites, mainly the ASTRA. First I had to modify the second antenna input for which I had to cut some connections on the PCB (Printed Circuit Board) in order not to send 12 V via the coax to a LNB. By means of a Kramer Video splitter/amplifier, the necessary connections were made to choose between cable television, Astra receipt or ATV. By installing two extra coax cables to the shack on the first floor, all signals could be seen and/or recorded both in the living room and in the shack. A small color TV (Radio Shack) was placed near the 70 cm television set in the living room to watch eventually transmitting amateur stations while seeing other inputs on the TV.
To mount the antenna on a separate rotor installation, a rigid aluminium tube with a length of 3 meter was attached to the side wall of my house. On that tube my old rotor (a Yeasu G400) was fixed, containing another aluminium tube with the 70 cm antenna (a 64 element Jaybeam) and, on top, the new FlexYagi FX2317 with 49 elements for the 23 cm band. In order to minimize cable losses it was connected by Aircom Plus coaxto the satellite receiver. This proved well to receive the 23 cm ATV repeater of Antwerp, ON0MTV. Via extra (thinner) coax cables a link was made to the shack on the first floor and connected to a television set.
For transmitting purposes, the 13 cm ATV kit of ON7IZ was bought, with the corresponding preamplifier to get an output of approximately 500 mW.
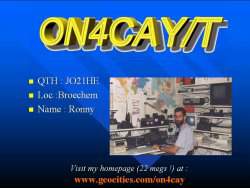
The TX unit was built in a nice metal housing together with the Video Logo Generator of DL1IE. An adjustable audio and an adjustable video amplifier were integrated. To switch easily between several inputs, 2 connections for audio and 2 for video were built-in. A HAMA AV-processor 124 served as external switch and for fine-tuning the input signals. If you want to have a better idea of what is meant, click HERE to go to a picture page where you can even see a movie of this combination, together with some test pictures you can use if you want to fine-tune your ATV equipment.
The PA was placed in a watertight drainage tube and attached on the main antenna tower and connected. For the antenna a 62 element RSE antenna for the 13 cm band was choosen with a gain of 19.7 dB. An Aircom Plus cable with a length of about 14 meters was used to get the link with the transmitter in the shack. Only for the last meter in the shack, Aircell coax was used since it is much more flexible and therefor is much easier to handle indoors. The whole was tuned to the 13 cm input of ON0MTV and yielded good reports on trying it out.
Three different sources of video images were present in the shack : an older Sony Video 8 Handycam CCD-F330E, a newly bought Sony Video 8 Handycam CCD-TR640E and lots of built-in functions (night-shot, title generator, etc...) and the second output of my computer via the Matrox G400 Dual-head video card (with 32 MB RAM onboard what was a lot in those days!). These sources were used as input for a HAMA AV Processor 124, of which the output was lead through a video logo generator (as developed by DL1IE) and, finally, to the input of the ATV tranmitter. Due to this setup, it is possible to change video sources while on-the-air, and generating an OSD (On Screen Display) message with my call and some info on QRV frequencies).